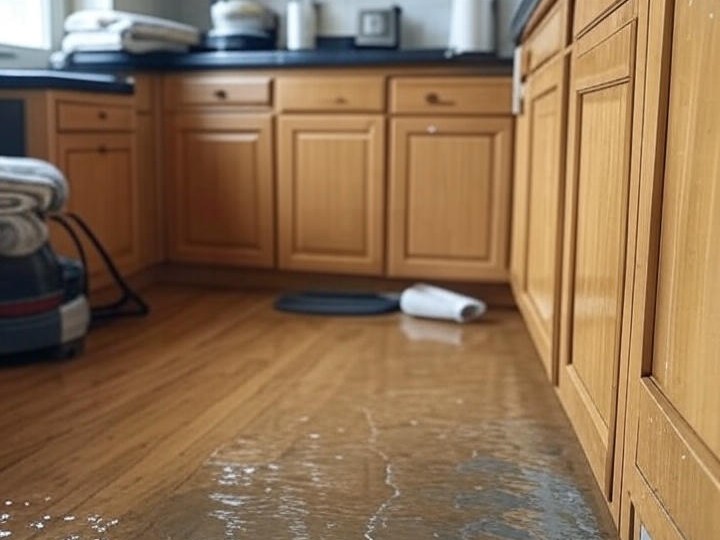
Water damage can turn your home upside down. A burst pipe, a leaking roof, or a flooded basement can leave you stressed and overwhelmed. I’ve seen it firsthand as a public insurance adjuster. One client, Sarah, had a pipe burst in her kitchen, soaking her cabinets and floors. She felt lost until I helped her document the damage properly for her insurance claim. Documenting water damage the right way is key to getting the payout you deserve. In this article, I’ll share simple steps to document water damage for your home insurance claim. I’ll break it down into easy-to-follow tips, share real-life examples, and explain why this process matters. Let’s dive in.
Why Documenting Water Damage Matters
When water damage hits, your insurance company needs proof to process your claim. Without clear evidence, they might undervalue or deny your claim. I’ve worked with homeowners who missed out on thousands of dollars because they didn’t document properly. Good documentation shows the extent of the damage and supports your case for repairs or replacements. It’s like building a strong case in court. The more evidence you have, the better your chances of a fair settlement.
The Institute of Inspection, Cleaning and Restoration Certification (IICRC) emphasizes that thorough documentation is critical for water damage claims. Their standards guide professionals like me to ensure every detail is captured. This helps you avoid disputes with your insurer. Let’s look at how to do it right.
Step 1: Act Fast to Stop the Damage
The moment you spot water damage, act quickly. Stop the source of the water if it’s safe. For example, if a pipe is leaking, shut off the main water valve. Mike had a washing machine hose break, flooding his laundry room. He turned off the water right away, which saved his floors from worse damage. Acting fast shows your insurer you took steps to limit the problem, which they expect under most home insurance policies.
Tips to Mitigate Water Damage:
- Turn off the water supply to stop leaks.
- Move furniture or belongings to a dry area.
- Use towels or a wet/dry vacuum to remove standing water.
Your home insurance policy likely includes a “duty to mitigate” clause. This means you’re required to take reasonable steps to prevent further damage. Document these efforts with photos or notes. It strengthens your claim.
Step 2: Take Clear Photos and Videos
Photos and videos are your best tools to document water damage. They provide visual proof of the destruction. When Sarah’s kitchen flooded, I told her to take pictures of everything before cleaning up. She snapped photos of the soaked cabinets, warped floors, and even the ceiling stains. These images were crucial when her insurer tried to lowball her claim.
How to Take Effective Photos and Videos:
- Capture wide shots of the entire affected area.
- Take close-ups of specific damages, like cracked drywall or ruined furniture.
- Record a video walking through the space, narrating what you see.
- Include a timestamp or date in your files for authenticity.
Store these files safely on your phone, computer, or cloud storage. I recommend taking photos from multiple angles to show the full scope of the damage. This evidence will back up your claim when you submit it.
Step 3: Keep a Detailed Inventory
Your insurance company will want a list of damaged items. This includes furniture, appliances, clothing, or anything affected by the water. Create a detailed inventory to document water damage accurately. Lisa, whose basement flooded during a storm, listed every item – from her ruined sofa to waterlogged books. This list helped her recover the full value of her belongings.
Steps to Create an Inventory:
- Write down each damaged item, including its brand and model if possible.
- Note the approximate age and condition of the item before the damage.
- Estimate the replacement cost or original purchase price.
- Attach receipts, manuals, or photos of the items if you have them.
Keep this inventory organized in a spreadsheet or notebook. It shows your insurer exactly what you lost and why you deserve compensation.
Step 4: Save Receipts for Repairs and Expenses
If you hire a professional to clean up or repair the damage, keep every receipt. This includes costs for water extraction, drying equipment, or temporary fixes like tarps. These expenses are often covered under your home insurance policy’s “additional living expenses” or “loss mitigation” coverage. For example, Mike, with the washing machine flood, rented fans to dry his laundry room. He saved the receipts, and his insurer reimbursed him for the cost.
Also, track any extra costs, like staying in a hotel if your home is unlivable. These receipts prove your out-of-pocket expenses and support your claim.
Step 5: Understand Your Home Insurance Policy
Your home insurance policy is the foundation of your claim. Most standard policies cover water damage from sudden events, like burst pipes or appliance leaks. However, they often exclude damage from floods or poor maintenance. I always tell clients to read their policy carefully. Sarah didn’t realize her policy covered mold remediation until I pointed it out. Knowing your coverage helps you document water damage with confidence.
If you’re unsure about your policy, I can help. As a public adjuster, I review policies and explain what’s covered. This ensures you don’t miss out on benefits you’re entitled to.
Step 6: Notify Your Insurance Company Promptly
Once you’ve started documenting, contact your insurance company. Most policies require you to report damage within a reasonable time. Delaying can hurt your claim. When Lisa’s basement flooded, she called her insurer the same day. This showed she was proactive, which worked in her favor.
When you call, note the date, time, and the name of the representative you speak with. Share your initial documentation, like photos or your inventory list. This starts the claim process and sets the stage for a smoother settlement.
Step 7: Work with a Professional if Needed
Documenting water damage can feel overwhelming, especially if the damage is severe. That’s where a public adjuster like me comes in. I help homeowners navigate the claims process, ensuring every detail is documented correctly. According to a study by the National Association of Insurance Commissioners, policyholders who work with adjusters often receive higher payouts. I’ve seen this with clients like Mike, whose claim increased after I reviewed his documentation and negotiated with the insurer.
A public adjuster can spot details you might miss. We also handle communication with your insurer, saving you time and stress.
Common Mistakes to Avoid
When you document water damage, small mistakes can cost you. I’ve seen homeowners make errors that weaken their claims. Here are a few to watch out for:
- Cleaning up before taking photos or videos. Always document first.
- Throwing away damaged items before listing them in your inventory.
- Waiting too long to report the damage to your insurer.
Avoid these pitfalls by following the steps above. They’ll keep your claim on track and maximize your payout.
How I Can Help You
Documenting water damage doesn’t have to be a headache. With the right approach, you can build a strong case for your insurance claim. I’ve helped homeowners like Sarah, Mike, and Lisa get the settlements they deserved. Whether it’s a small leak or a major flood, I’m here to guide you through the process.
If you’re dealing with water damage, don’t go it alone. Request a free claim review from The PA You Know. I’ll review your policy, assess your damage, and help you document everything properly. Visit my website at The PA You Know to get started. Let’s make sure you get every penny you’re entitled to.